
Configuring pools in Vnish firmware
Configuring pools in Vnish firmware
The Vnish firmware is a powerful tool for optimizing the performance of ASIC miners, allowing you to increase efficiency and monitor device parameters in real time. One of the key steps in configuring a miner is properly connecting to a pool for stable and efficient mining.
If you don’t yet have an account on a pool, read the instructions.
This guide will walk you through setting up a pool in the Vnish firmware so your miner can operate correctly.
Step-by-step Guide
Accessing the miner’s web interface
- ► Connect to the network where your miner is located.
- ► Open a browser on your computer or mobile device.
- ► Enter the miner’s IP address in the browser’s address bar.
- ► Enter the login password (default: admin, unless changed).
Navigating to the pool settings section
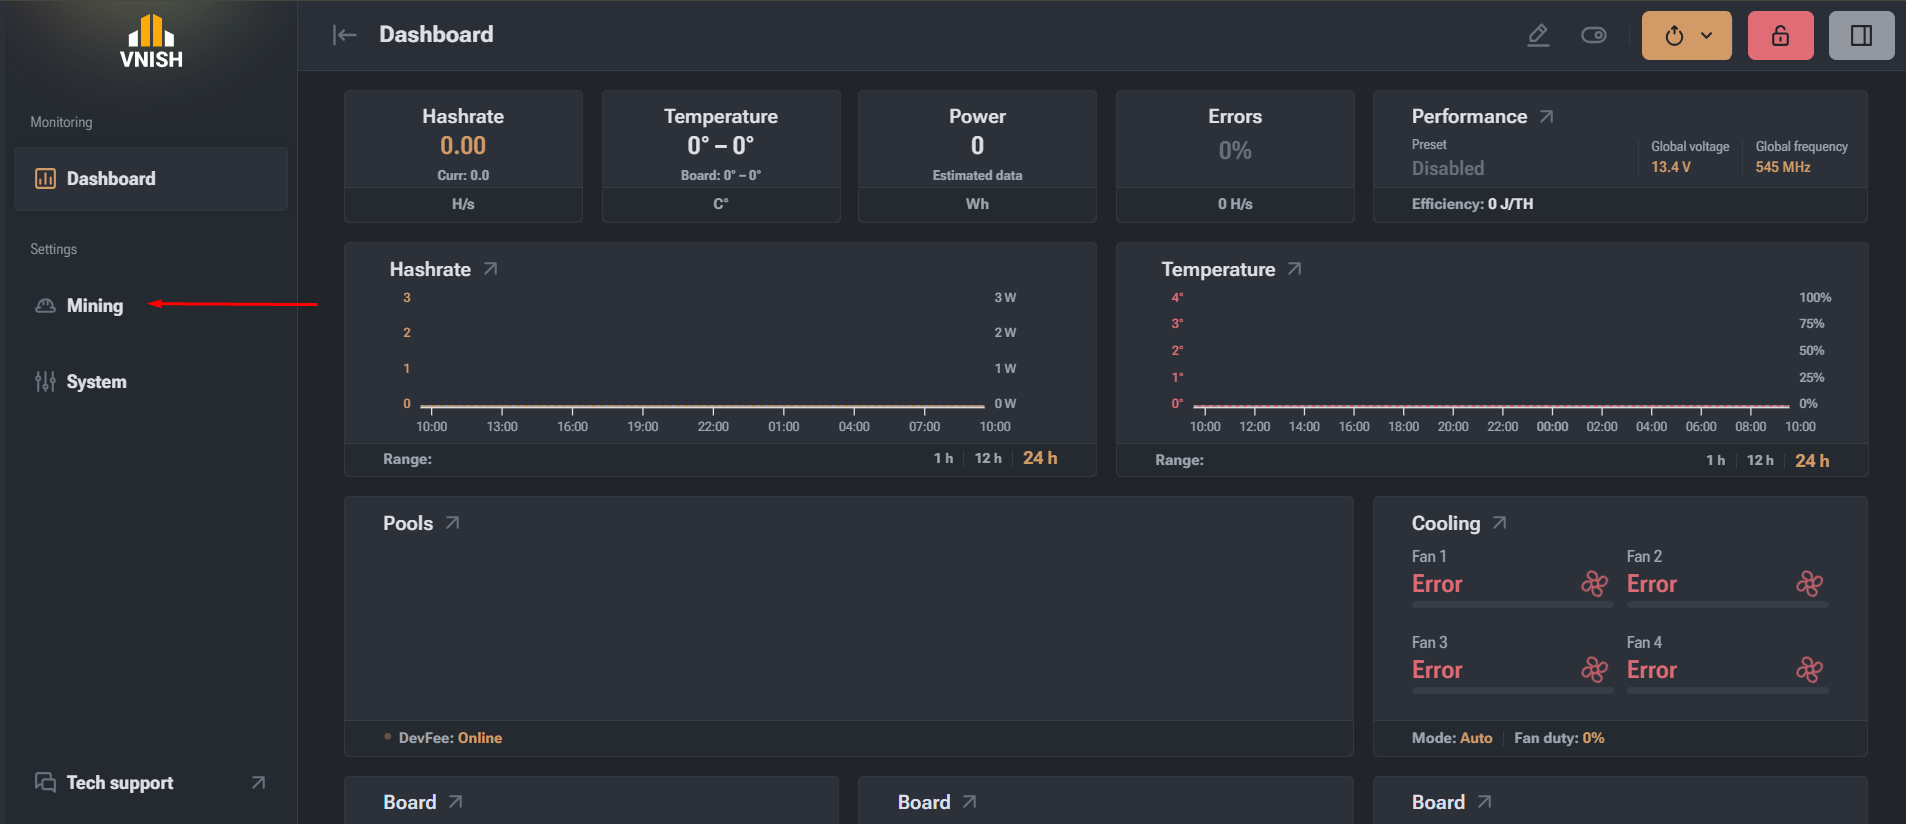
- ► In the interface menu, find the Mining section.
Entering pool details
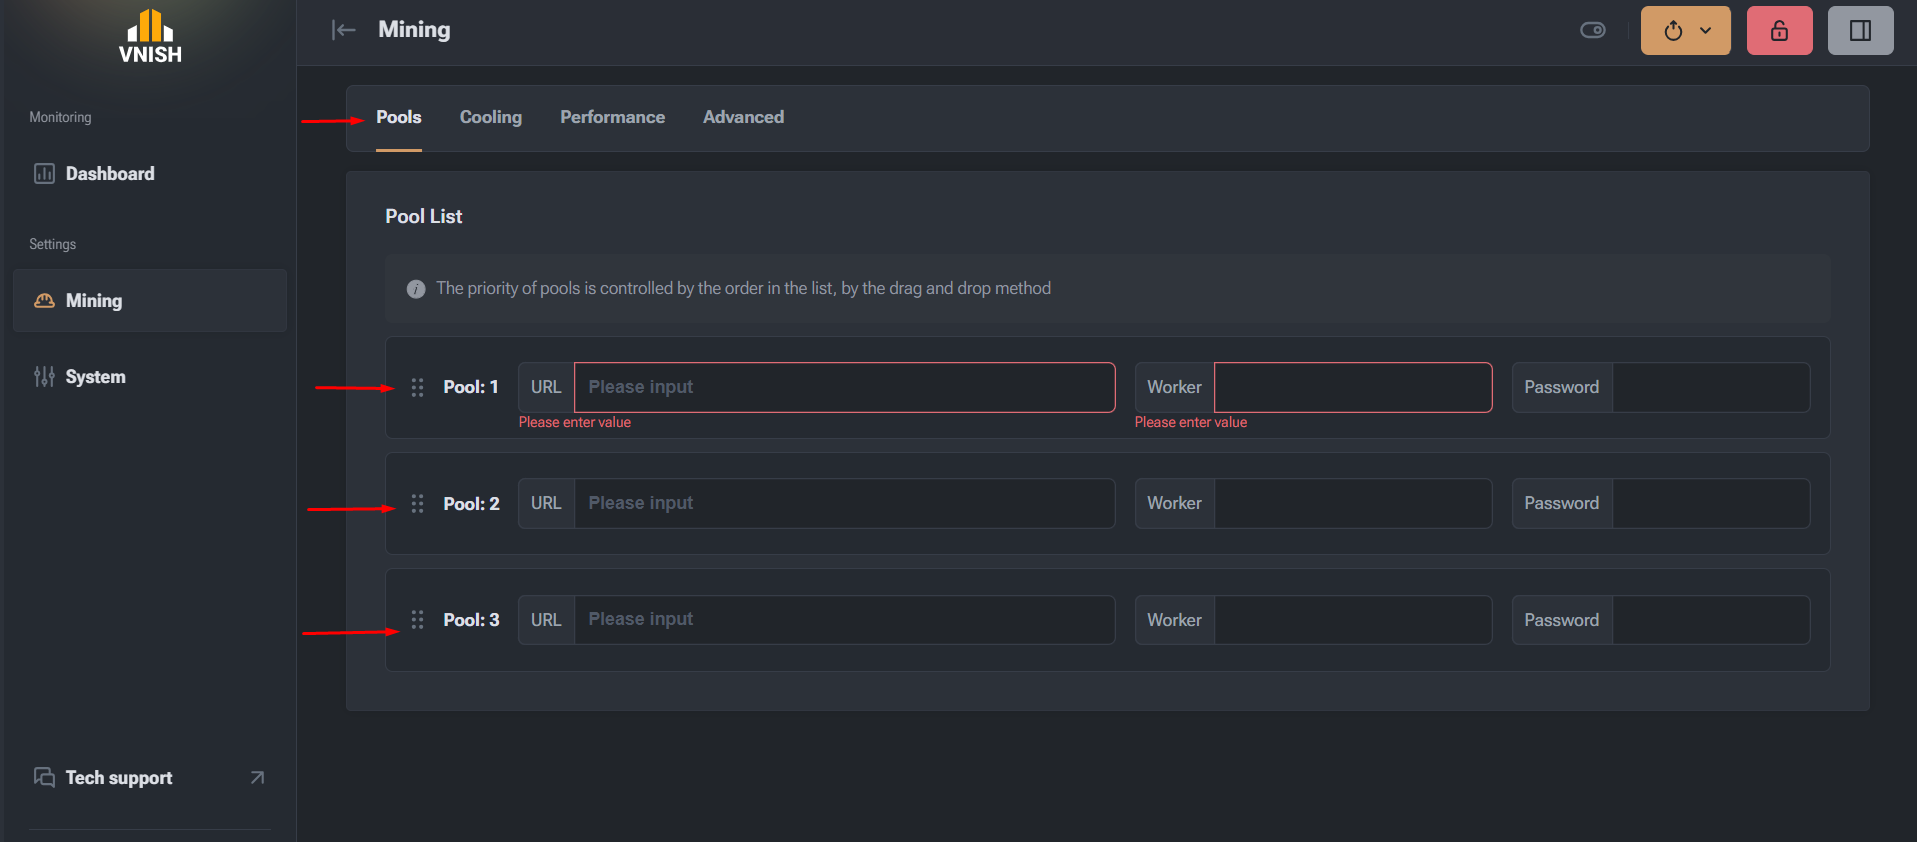
- ► URL or pool server address: enter the pool address, for example, for ViaBTC: stratum+tcp://
: . - ► Username (Worker): specify the name of your worker created on the pool.
- ► Password: if required by the pool, enter the worker’s password; often this is just “x” or left blank.
- ► You can add multiple pools for backup connection by setting a primary and a secondary pool.
- ► URL or pool server address: enter the pool address, for example, for ViaBTC: stratum+tcp://
Saving settings and rebooting
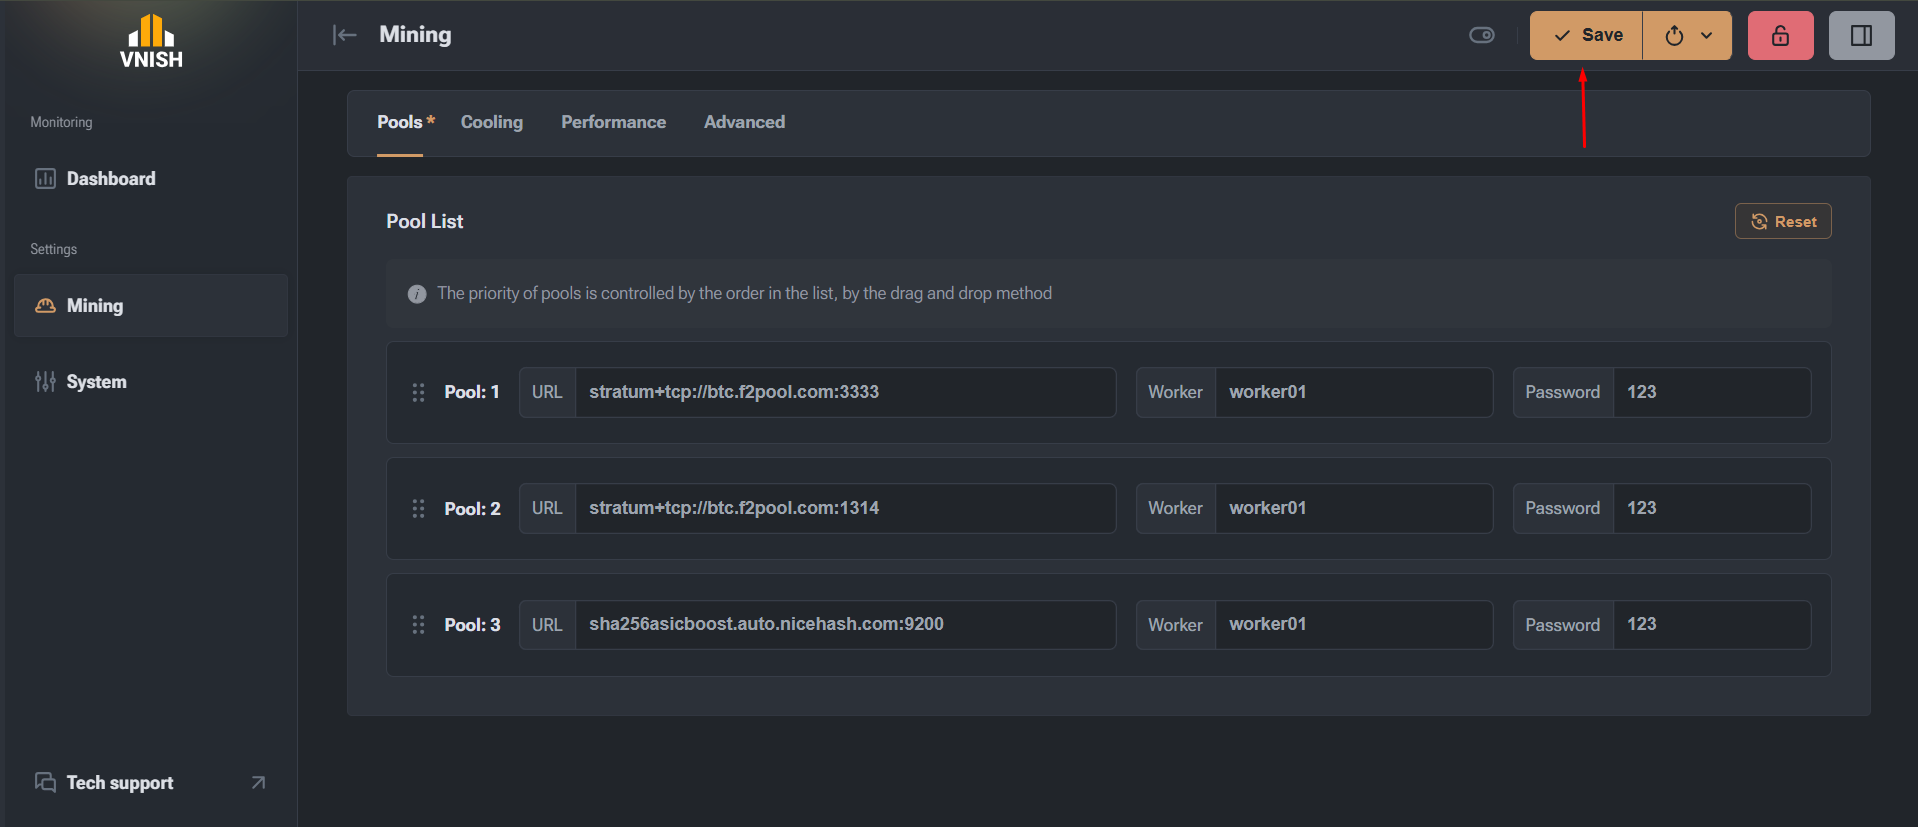
- ► After entering all required data, click the Save button.
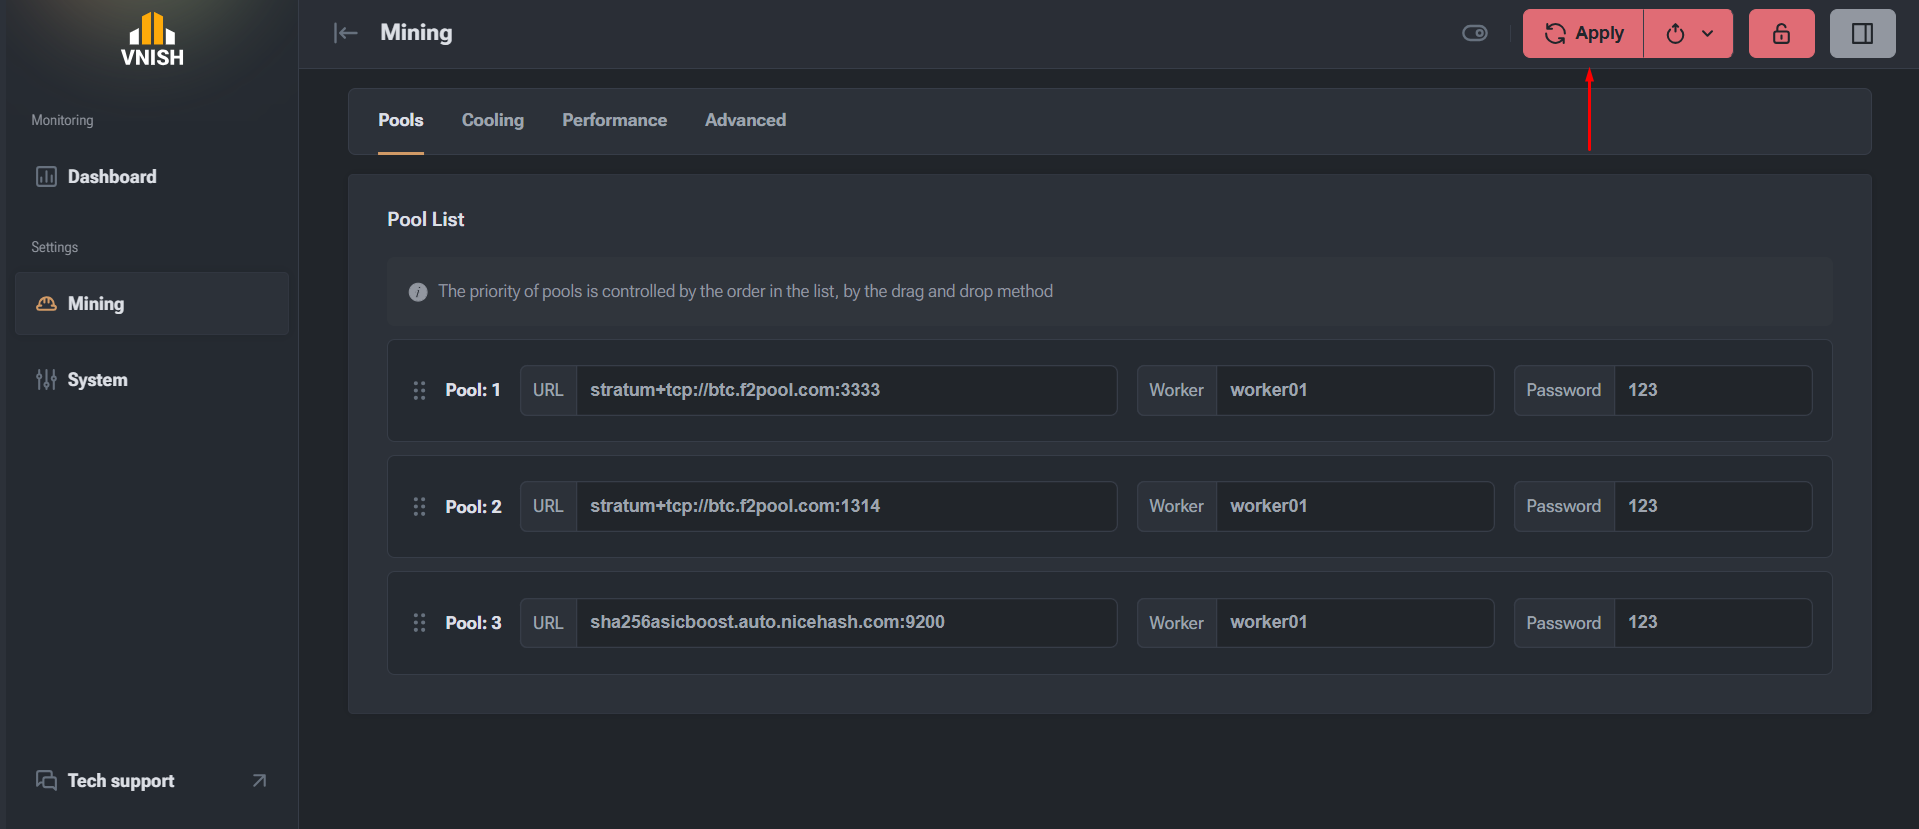
- ► To apply the new settings, reboot the device using the Apply button.
Useful tips
- ► Always use up-to-date pool addresses and ports, available on the pool’s official website.
- ► For better stability, configure at least two pools - primary and backup.
- ► After updating the firmware, check your pool settings.
Your miner is now ready for stable operation on the selected pool with the Vnish firmware!